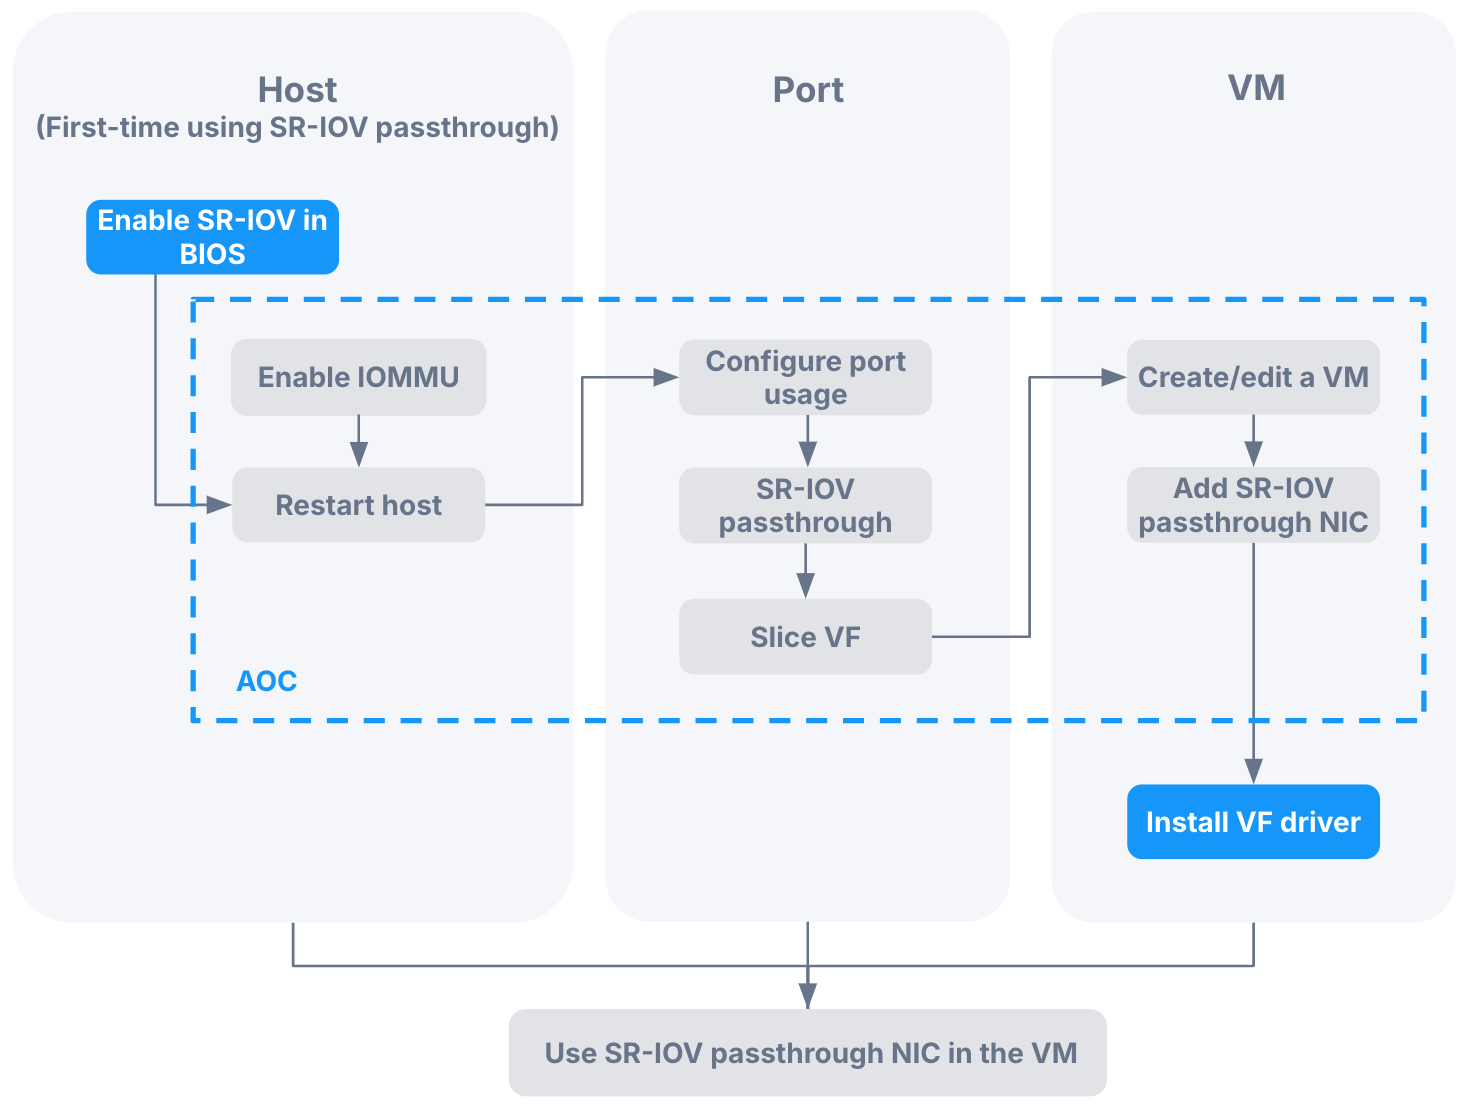
When using the SR-IOV feature of NICs, you need to complete the corresponding configuration in the ACOS cluster. The specific procedure is shown in the following diagram.
Precaution
You can only perform the SR-IOV related operations on one network port of one host at a time, including switching its use to SR-IOV passthrough and editing the number of SR-IOV passthrough NICs. You cannot operate on multiple ports simultaneously.
Procedure
Before deploying an ACOS cluster, ensure that IOMMU and SR-IOV are enabled in the BIOS of all hosts that require the SR-IOV feature.
For detailed instructions, refer to the section on Checking BIOS settings.
Log in to AOC and enable IOMMU on the hosts that require the SR-IOV feature.
For detailed instructions, refer to the section on Enabling IOMMU. Once enabled, the host IOMMU status will change to Need reboot.
Restart the host.
For detailed instructions, refer to the section on Restarting a node.
Edit the network port that needs to enable the SR-IOV feature, switch the Use of port to SR-IOV passthrough, and set the number of passthrough NICs.
For detailed instructions, refer to the section on Switching the use of port.
After the configuration is complete, if you need to modify the number of SR-IOV passthrough NICs, you can refer to the section on Reslicing an SR-IOV passthrough NIC.
Return to the network port list of the host and confirm that the edited port includes the following information, indicating that SR-IOV has been enabled on this port.
Host IOMMU status: In effect
SR-IOV status: Enabled
Total SR-IOV passthrough NICs: displays the configured value in step 4.
Used SR-IOV passthrough NICs: 0
Information:
If the SR-IOV status shows
Driver not ready, you need to refer to step 3 and restart the host again for the SR-IOV feature to take effect.
Review step 2 - 5 to enable SR-IOV for network ports that support this feature on other hosts.
Attach SR-IOV passthrough NICs to the virtual machines on the hosts with network ports that have SR-IOV enabled.
To create a virtual machine and attach an SR-IOV passthrough NIC, refer to the section on Creating a virtual machine.
To attach SR-IOV passthrough NICs to existing virtual machines, refer to the section on Editing network devices.
Enter the virtual machine list, select the virtual machine that has SR-IOV passthrough NIC attached, and view Network device in the pop-up details panel on the right. The icon of the SR-IOV passthrough NIC will include the SR label.