Refer to Replacing an SSD (AVE).
The steps described in this section apply only to replacing an NVMe SSD on ACOS (VMware ESXi) cluster hosts that meet all the following conditions:
Download the compatible vmpctl file based on the CPU architecture and operating system of your local host.
Rename the vmpctl file and grant executable permissions.
chmod a+x vmpctl to grant executable permissions.Use a terminal tool on your local host to open the vmpctl file and run the following command to hot remove the NVMe SSD from the SCVM via the vSphere API.
The ESXi PCI ID of the NVMe SSD can be obtained based on the SSD name, as described in Obtaining the ESXi PCI ID corresponding to the NVMe passthrough disk name.
./vmpctl remove --address=<ESXI_IP> --username=<ESXI_USER> --password=<ESXI_PASSWORD> --vm=<SCVM_NAME> --device=<ESXI_PCI_ID>| Parameter | Description |
|---|---|
ESXI_IP | IP address of the ESXi host |
ESXI_USER | Username of the ESXi host |
ESXI_PASSWORD | Password of the ESXi host |
SCVM_NAME | Name of the SCVM |
ESXI_PCI_ID | ESXi PCI ID of the NVMe SSD |
Note:
- When the local host is running macOS, a pop-up message may appear indicating that the vmpctl file cannot be opened. This is likely due to the file being automatically blocked by the system. In this case, click the ? icon in the upper-right corner of the pop-up window and follow the instructions to open the file.
- If the username or password of the ESXi host contains special characters and the local host is running Linux or macOS, you need to enclose the username or password in single quotes (') when running the command.
remove device success, it indicates that the device has been successfully removed.remove device failed, it indicates that the removal failed. You can run the command dmesg -T | tail on the ESXi host and check the kernel logs to determine whether hardware incompatibility exists. Resolve this issue and try again.Optional: Run the lsblk, lspci, or mdadm command within the SCVM to verify whether the NVMe SSD has been successfully removed.
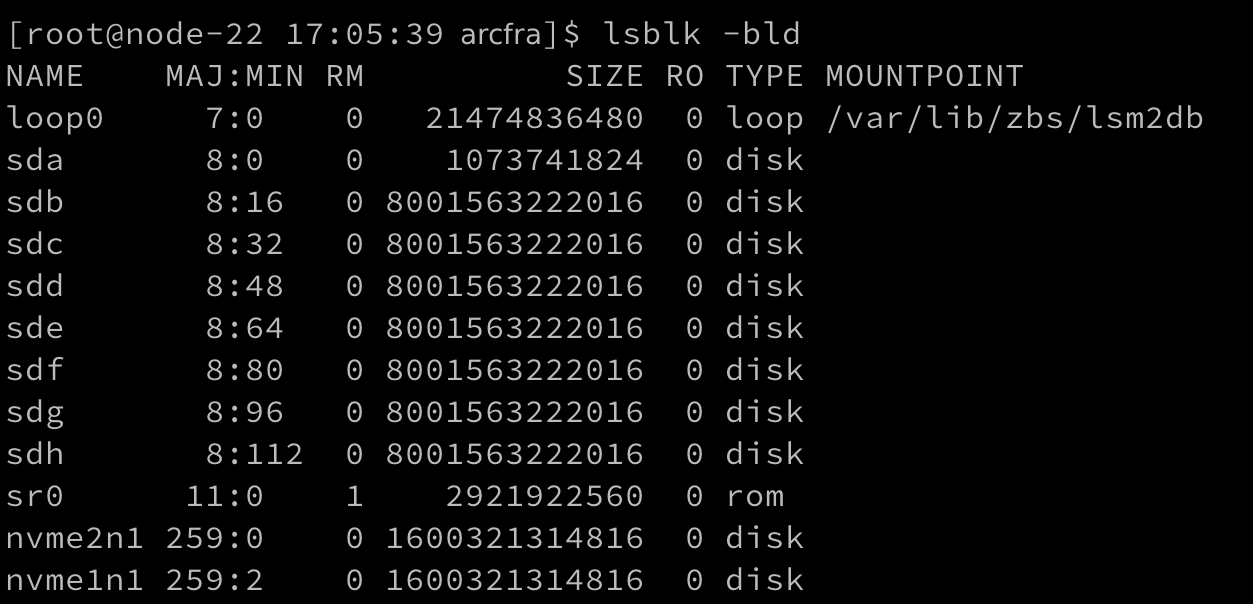
Run lsblk -bld to view all disk information. If the output does not contain the removed disk, it indicates that the disk has been successfully removed.
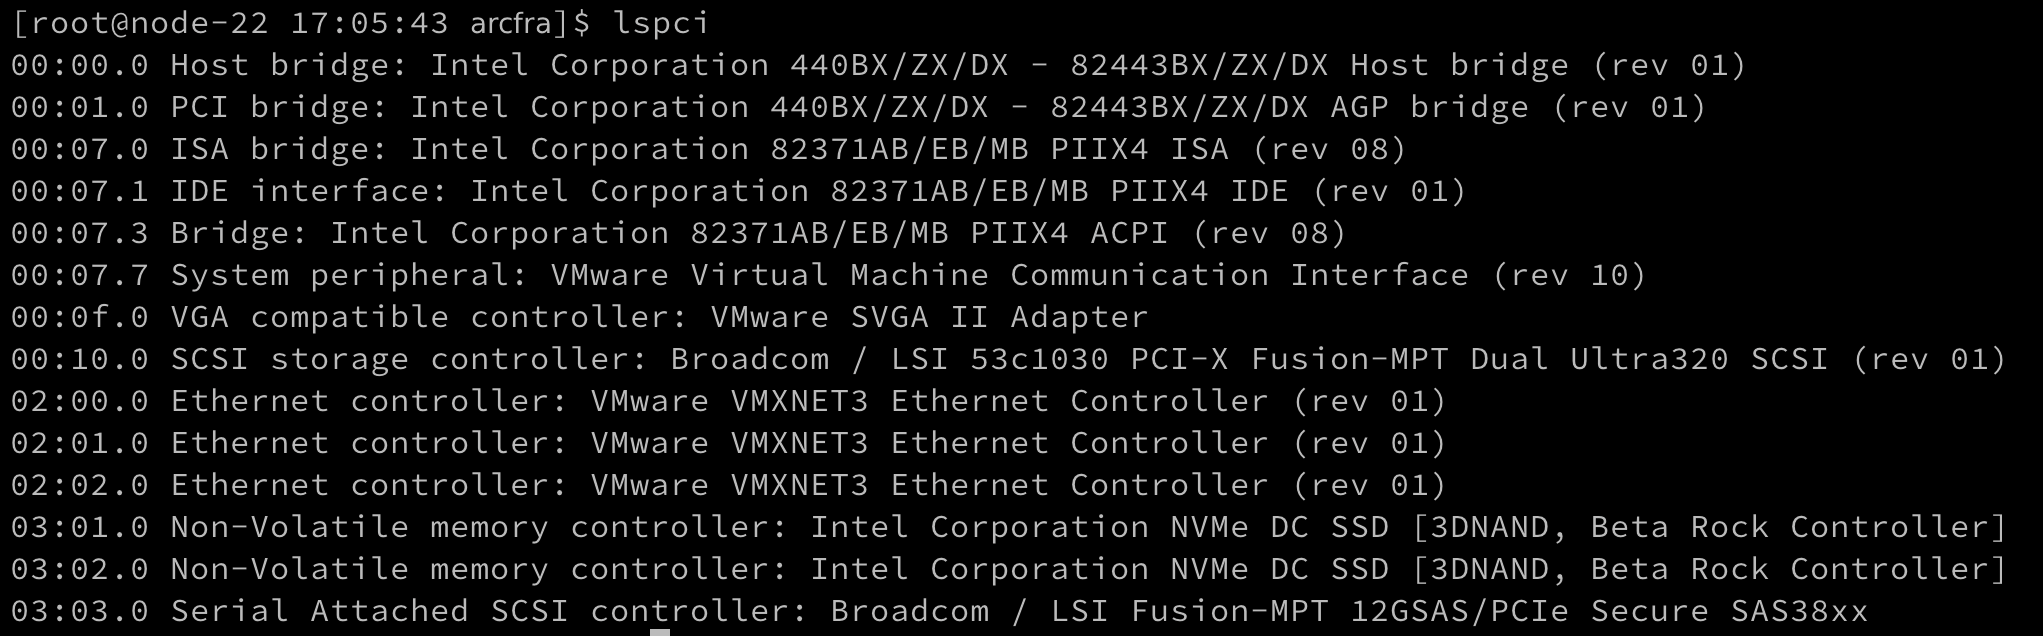
Run lspci to view all PCI devices. If the output does not contain the removed disk, it indicates that the disk has been successfully removed.
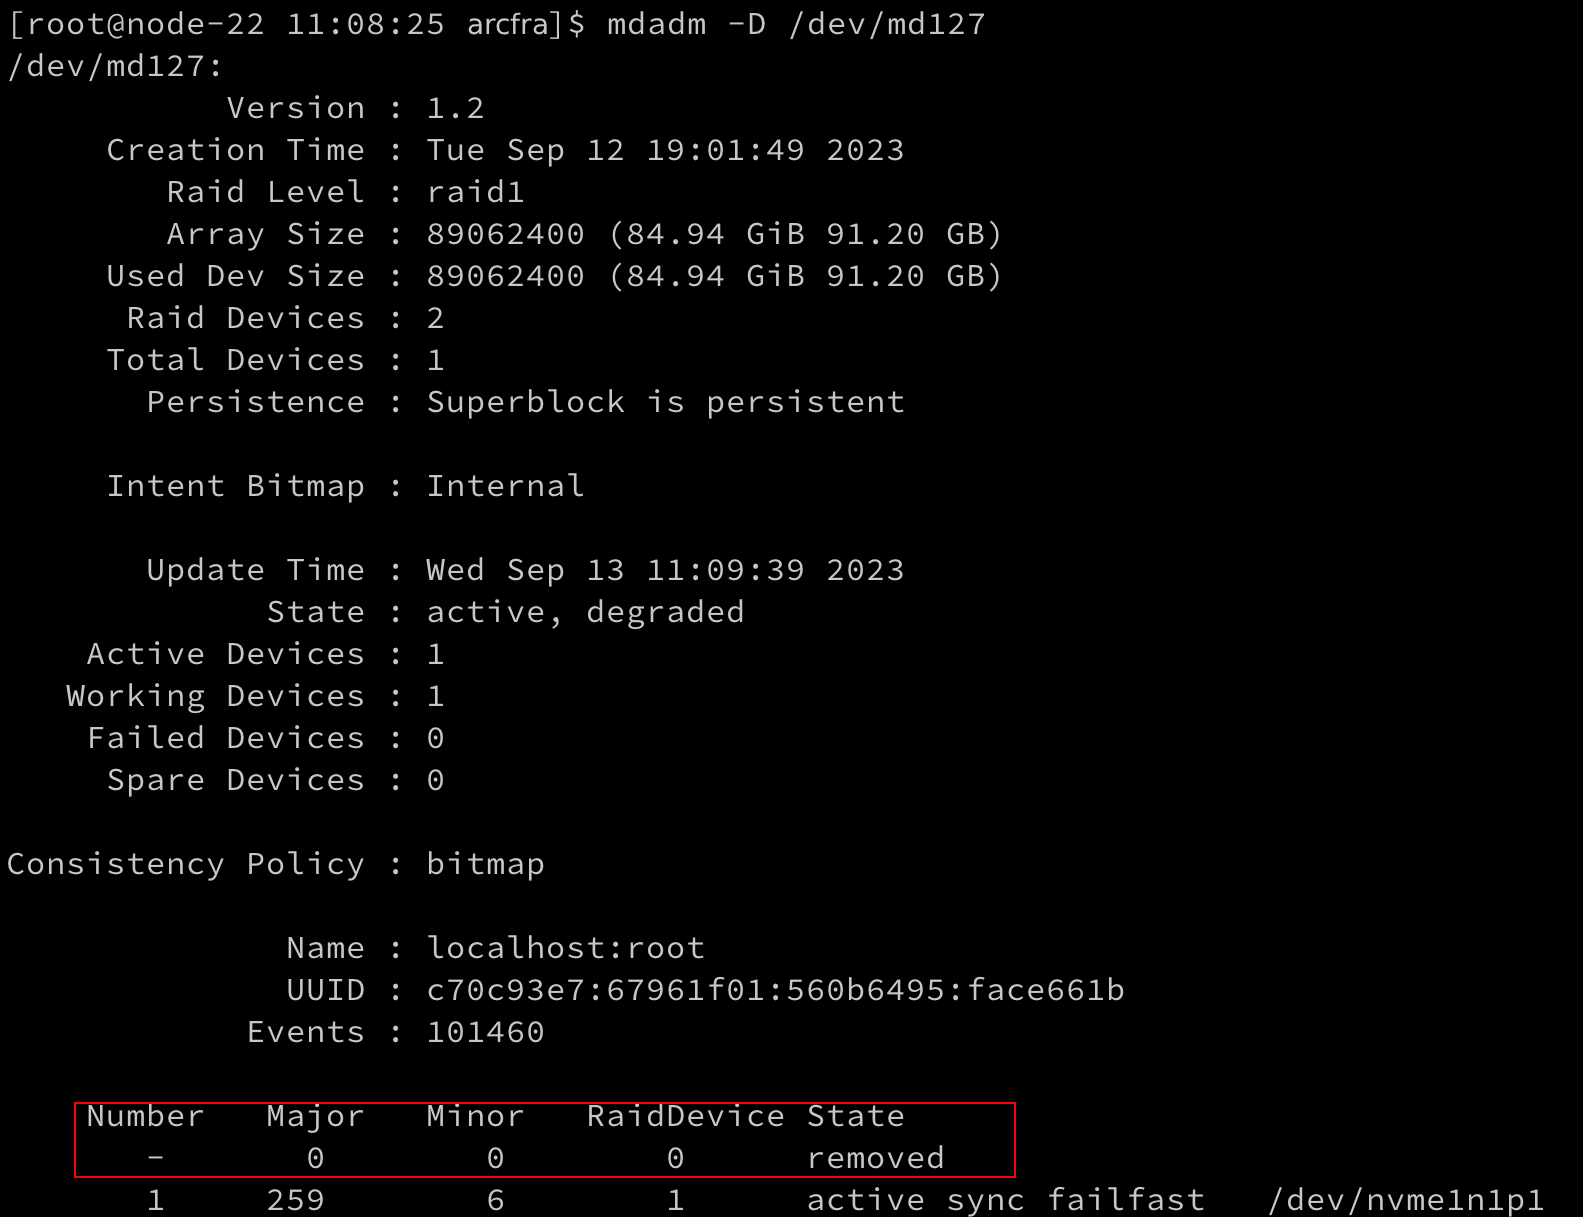
For example, if the NVMe SSD belongs to a RAID array named md127, run mdadm -D /dev/md127 to view the RAID array information, where md127 represents the name of this RAID array. If the output displays the state as removed, the device has been successfully removed.
Physically remove the NVMe SSD from the server.
Physically install the NVMe SSD into the server.
Use SSH to log in to the ESXi host where the NVMe SSD is located, and run the following command to obtain all NVMe SSD information. Identify the corresponding disk based on Physical Slot and Slot Description, and obtain its ESXi PCI ID from the ID shown in the Address field.
esxcli hardware pci list --class=0x0108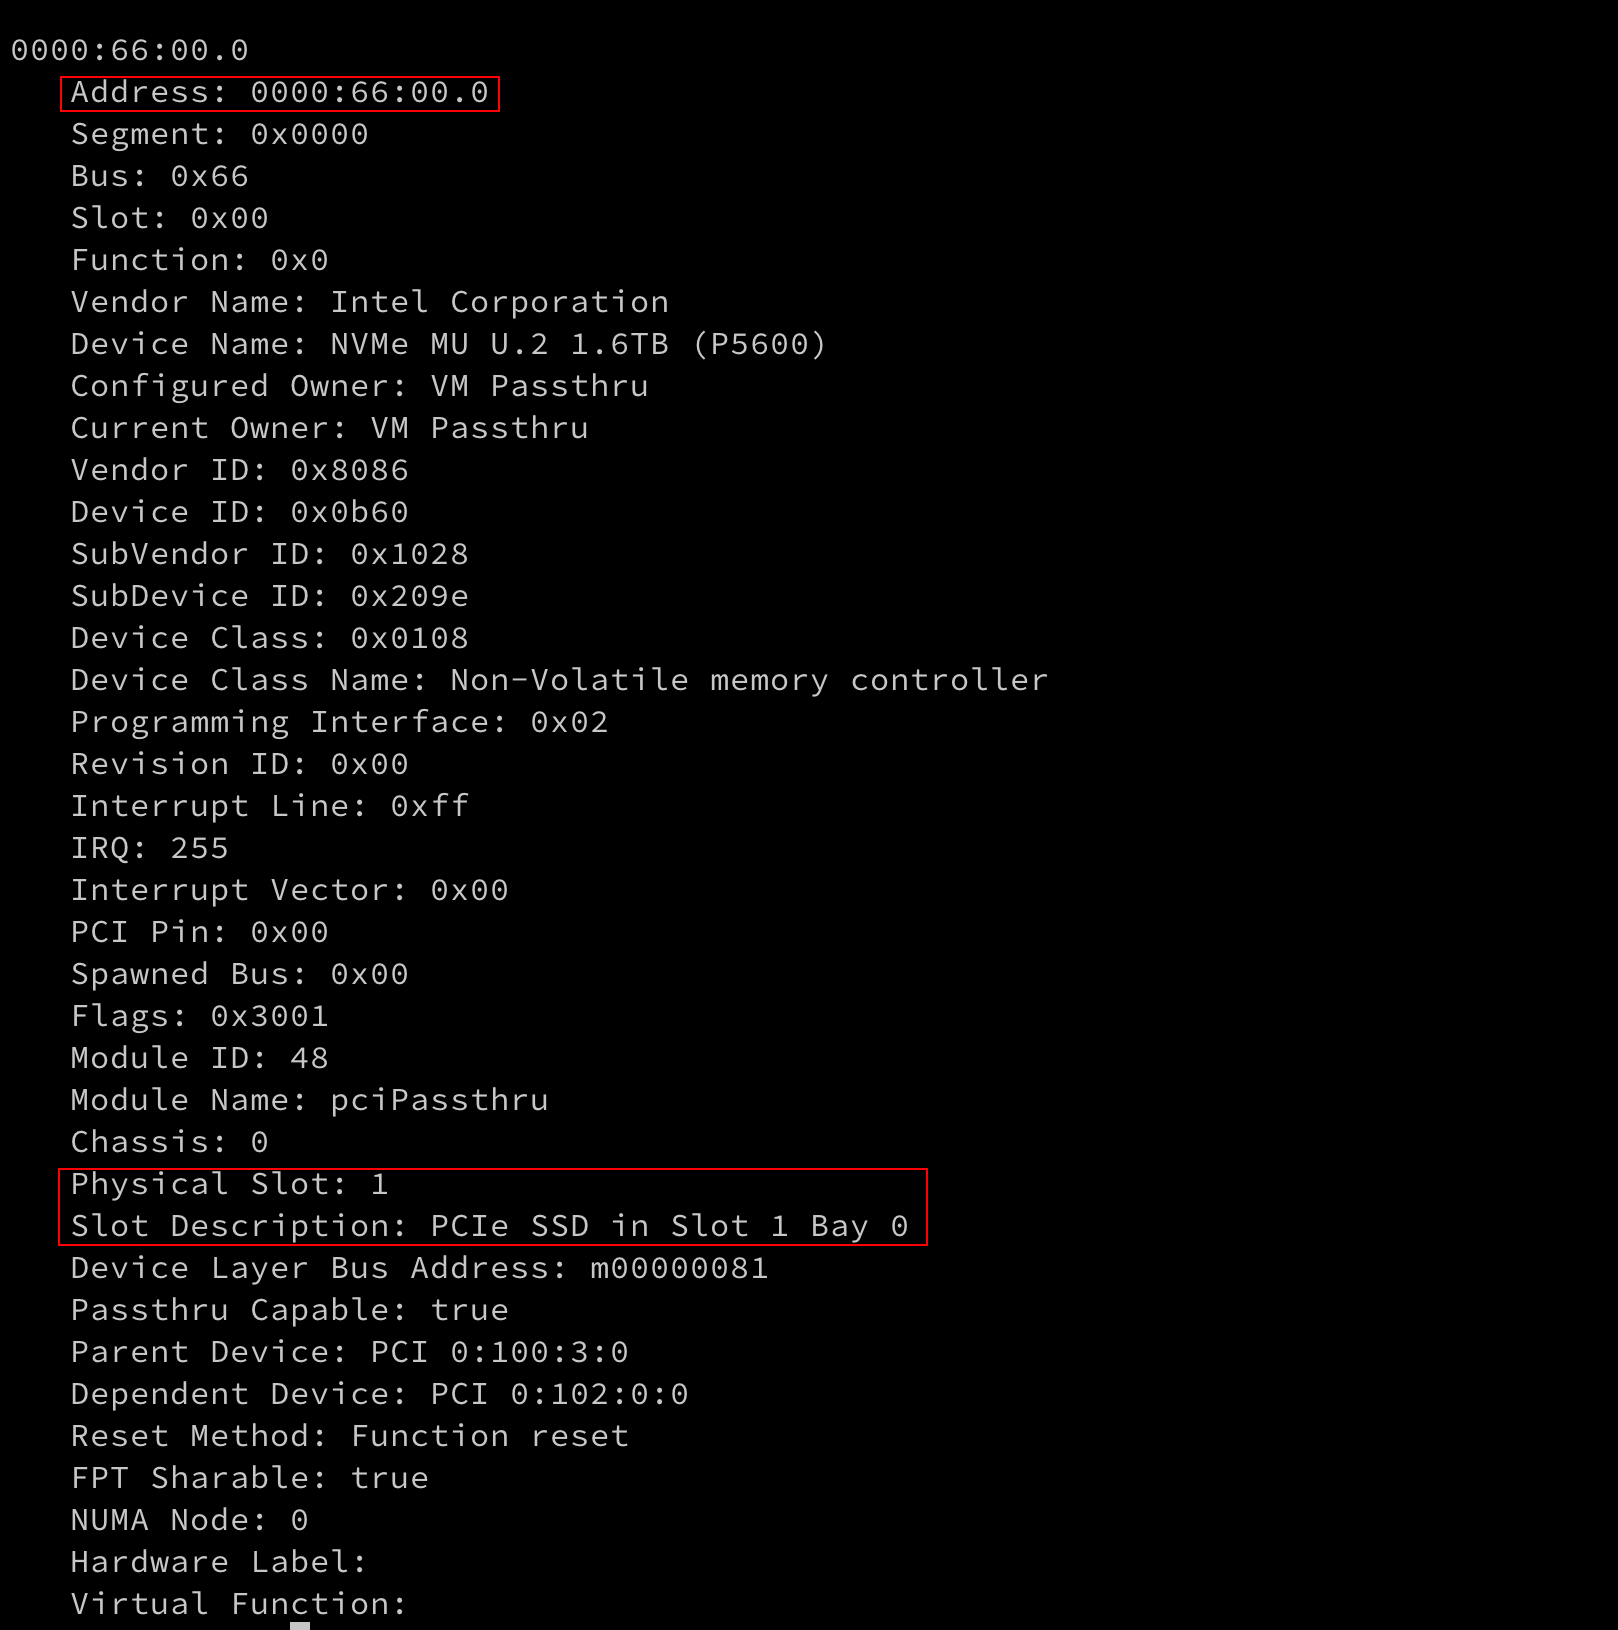
Use a terminal tool on your local host to open the vmpctl file and run the following command to hot add the NVMe SSD to the SCVM.
./vmpctl add --address=<ESXI_IP> --username=<ESXI_USER> --password=<ESXI_PASSWORD> --vm=<SCVM_NAME> --device=<ESXI_PCI_ID>| Parameter | Description |
|---|---|
ESXI_IP | IP address of the ESXi host |
ESXI_USER | Username of the ESXi host |
ESXI_PASSWORD | Password of the ESXi host |
SCVM_NAME | Name of the SCVM |
ESXI_PCI_ID | ESXi PCI ID of the NVMe SSD |
Note:
- When the local host is running macOS, a pop-up message may appear indicating that the vmpctl file cannot be opened. This is likely due to the file being automatically blocked by the system. In this case, click the ? icon in the upper-right corner of the pop-up window and follow the instructions to open the file.
- If the username or password of the ESXi host contains special characters and the local host is running Linux or macOS, you need to enclose the username or password in single quotes (') when running the command.
add device success, it indicates that the device has been successfully added.add device failed, it indicates that the addition failed. You can run the command dmesg -T | tail on the ESXi host and check the kernel logs to determine whether hardware incompatibility exists. Resolve this issue and try again.Follow the steps below to mount the disk.
If the replaced NVMe SSD is a cache disk containing a metadata partition (tiered storage mode), or a data disk containing a metadata partition (non-tiered storage mode), run the following command in the SCVM, where nvme1n1 refers to the name of the NVMe SSD to be mounted.
zbs-deploy-manage mount-disk /dev/nvme1n1 smtx_systemIf the output displays Mount disk: /dev/nvme1n1 success!, it indicates that the disk is successfully mounted.
If the replaced NVMe SSD is a cache disk containing no metadata partitions (tiered storage mode), run the following command in the SCVM, where nvme2n1 refers to the name of the NVMe SSD to be mounted.
zbs-deploy-manage mount-disk /dev/nvme2n1 cacheIf the output shows Mount disk: /dev/nvme2n1 success!, it indicates that the disk is successfully mounted.
Run the lsblk command in the SCVM to verify that the newly installed NVMe SSD is successfully partitioned.