Search Docs...
⌘ K
CentOS and RHEL share the same installation steps when using the official repository to install cloud-init.
As CentOS includes cloud-init in its own repository by default, you will not need to add an additional repository. However, if you are using the RHEL, you will need to add a repository, which can be either the official RHEL repository or CentOS repository. For detailed instructions, see Adding a Yum Repository.
The following steps demonstrate how to install cloud-init on CentOS 7.4 with root privileges:
Run the following command to install cloud-init:
yum install -y cloud-init
Run the following command to enable cloud-init on boot:
systemctl enable cloud-init-local.service cloud-init.service cloud-config.service cloud-final.service
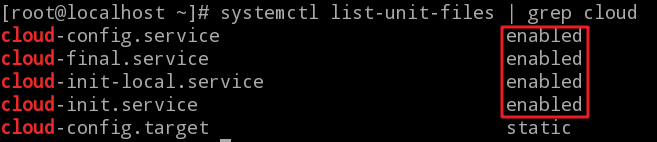
Run the following command to verify that cloud-init is enabled on boot:
systemctl list-unit-files | grep cloud
If the returned messages show enabled as follows, then cloud-init is enabled on boot.
The following steps demonstrate how to install cloud-init on OpenSUSE 12 with root privileges:
Run the following command to add the zypper repository to OpenSUSE 12 SP3:
zypper addrepo -fc https://download.opensuse.org/repositories/Cloud:/Tools/SLE_12_SP3/Cloud:Tools.repo
Note:
It is recommended to use the link starts with
https. If thehttpslink is not accessible, change thehttpstohttpand then try again.
Run the following command to install cloud-init:
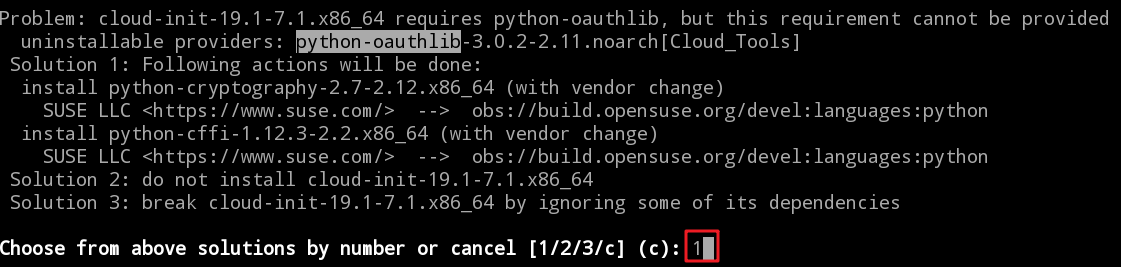
zypper --gpg-auto-import-keys install cloud-init
Due to different system environments, you might be prompted to install python-oauthlib. If this appears, enter 1 and press Enter, and then you can proceed to the next step.
Run the following command to enable cloud-init on boot:
systemctl enable cloud-init-local.service cloud-init.service cloud-config.service cloud-final.service
Note:
If cloud-init is installed with the
zypperrepository, using the above command to enable start on boot will not take effect. To make it effective, you need to manually change the service script fromWantedBy=cloud-init.targettoWantedBy=multi-user.targeafter running this command.
Optional: If the installed cloud-init version is cloud-init-19.1-7.1.x86_64, you need to run an extra command to resolve an internal bug in this version:
sed -i "s/path = net.sys_dev_path(iface.name)/path = net.sys_dev_path(iface\[\"name\"\])/" /usr/lib/python2.7/site-packages/cloudinit/net/sysconfig.py
The installation is the same on Ubuntu and Debian using the official repository, which is typically already included in the cloud-init installation package provided by Linux.
The following operations demonstrate how to install cloud-init on Ubuntu 18.04 LTS with root privileges:
Run the following command to install cloud-init:
apt-get install cloud-init
Edit the /etc/network/interfaces file to support configuring ENI. Replace its content with the following:
source /etc/network/interfaces.d/*
Optional: If the installed cloud-init version is cloud-init-19.2-36, run an extra command to resolve an internal bug in this version:
sed -i "s/for cfg_source in order/for cfg_source in available_cfgs.keys()/g" /usr/lib/python3/dist-packages/cloudinit/stages.py