Prerequisites
Procedure
Shut down the virtual machine.
Click the virtual machine to access its details panel, then click Edit in the Disk section.
In the pop-up Edit disk window, make sure the bus type of all virtual disks is set to IDE.
Click Create virtual volume to create a new virtual volume and set its bus type to VIRTIO. Other settings can be left at their defaults.
Click Mount CD-ROM > Load the ISO image to load the VirtIO driver ISO image into a CD-ROM, then click Save.
In the virtual machine details panel, click Edit in the Network device section. In the pop-up Edit network device for VM window, check if there is any VIRTIO virtual NIC. If not, add a new virtual NIC and set its mode to VIRTIO.
Wait until the above modifications have been successfully updated, then click Start in the details panel of the virtual machine.
After the virtual machine has been started, click Terminal to open the terminal page. Log in to this virtual machine and open its device manager to update the VirtIO disk driver and NIC driver.
To update the VirtIO disk driver
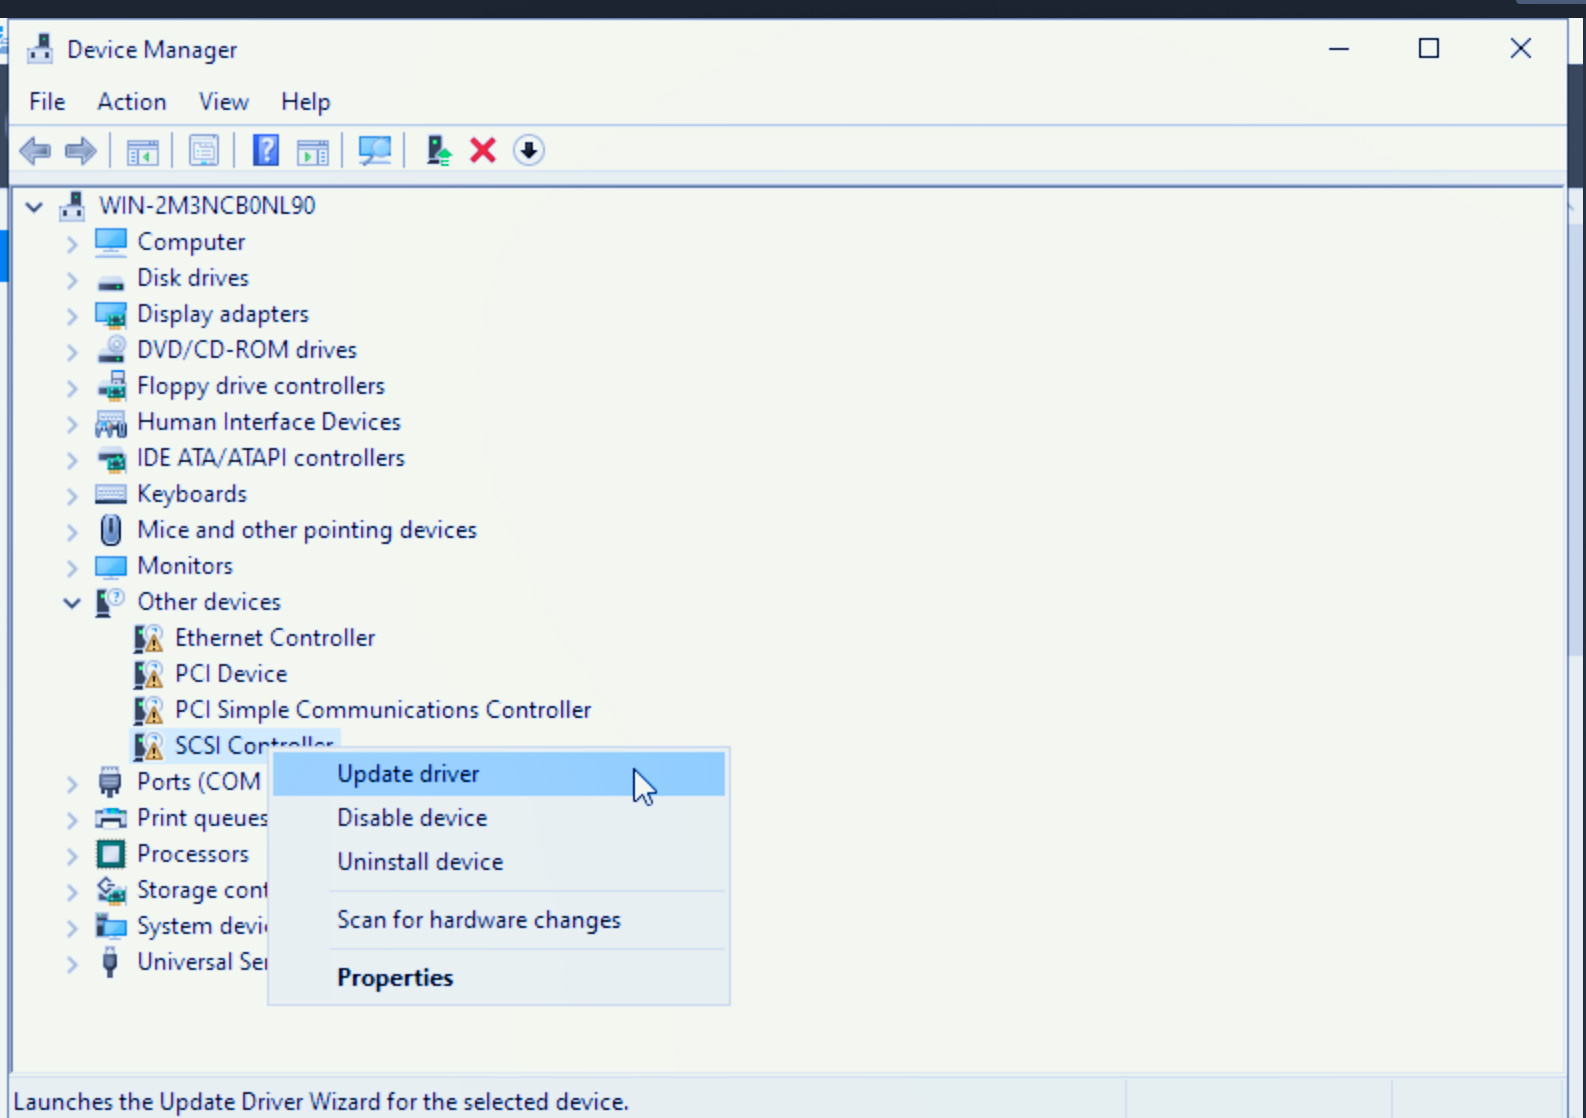
In the Device Manager window, expand Other devices, right-click SCSI Controller, and select Update driver.
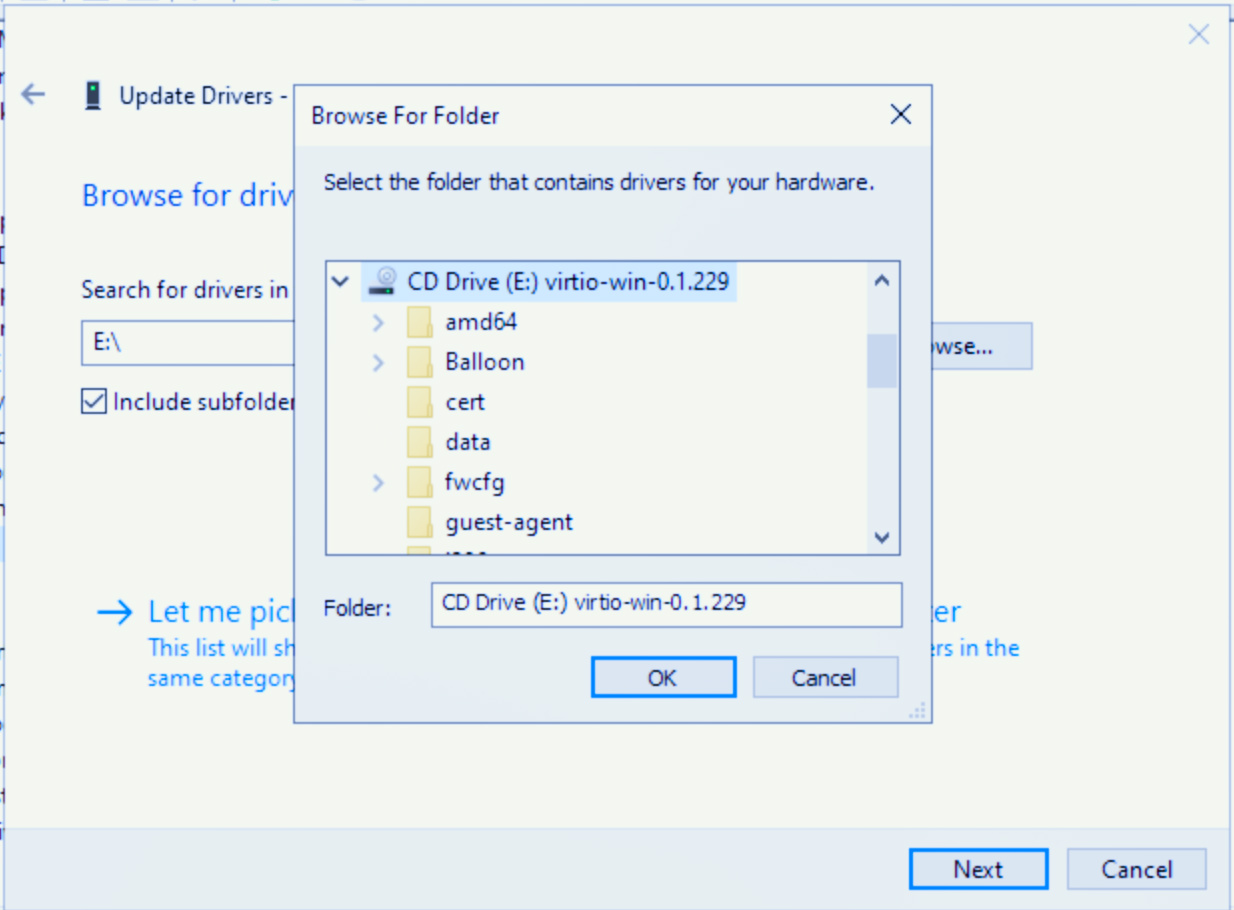
In the pop-up Update Drivers - SCSI Controller dialog box, click Browse my computer for drivers. Select the folder that contains the CD drive for the VirtIO drivers and click OK. Then, click Next in the Update Drivers - SCSI Controller dialog box.
In the pop-up Windows Security dialog box, make sure the driver to be installed is Red Hat VirtIO SCSI controller, then click Install.
After the installation is complete, in the Device Manager window, if you can find Red Hat VirtIO SCSI Disk Device under Disk drives and Red Hat VirtIO SCSI controller under Storage controllers, it indicates that the VirtIO disk driver has been successfully installed.

To update the VirtIO NIC driver
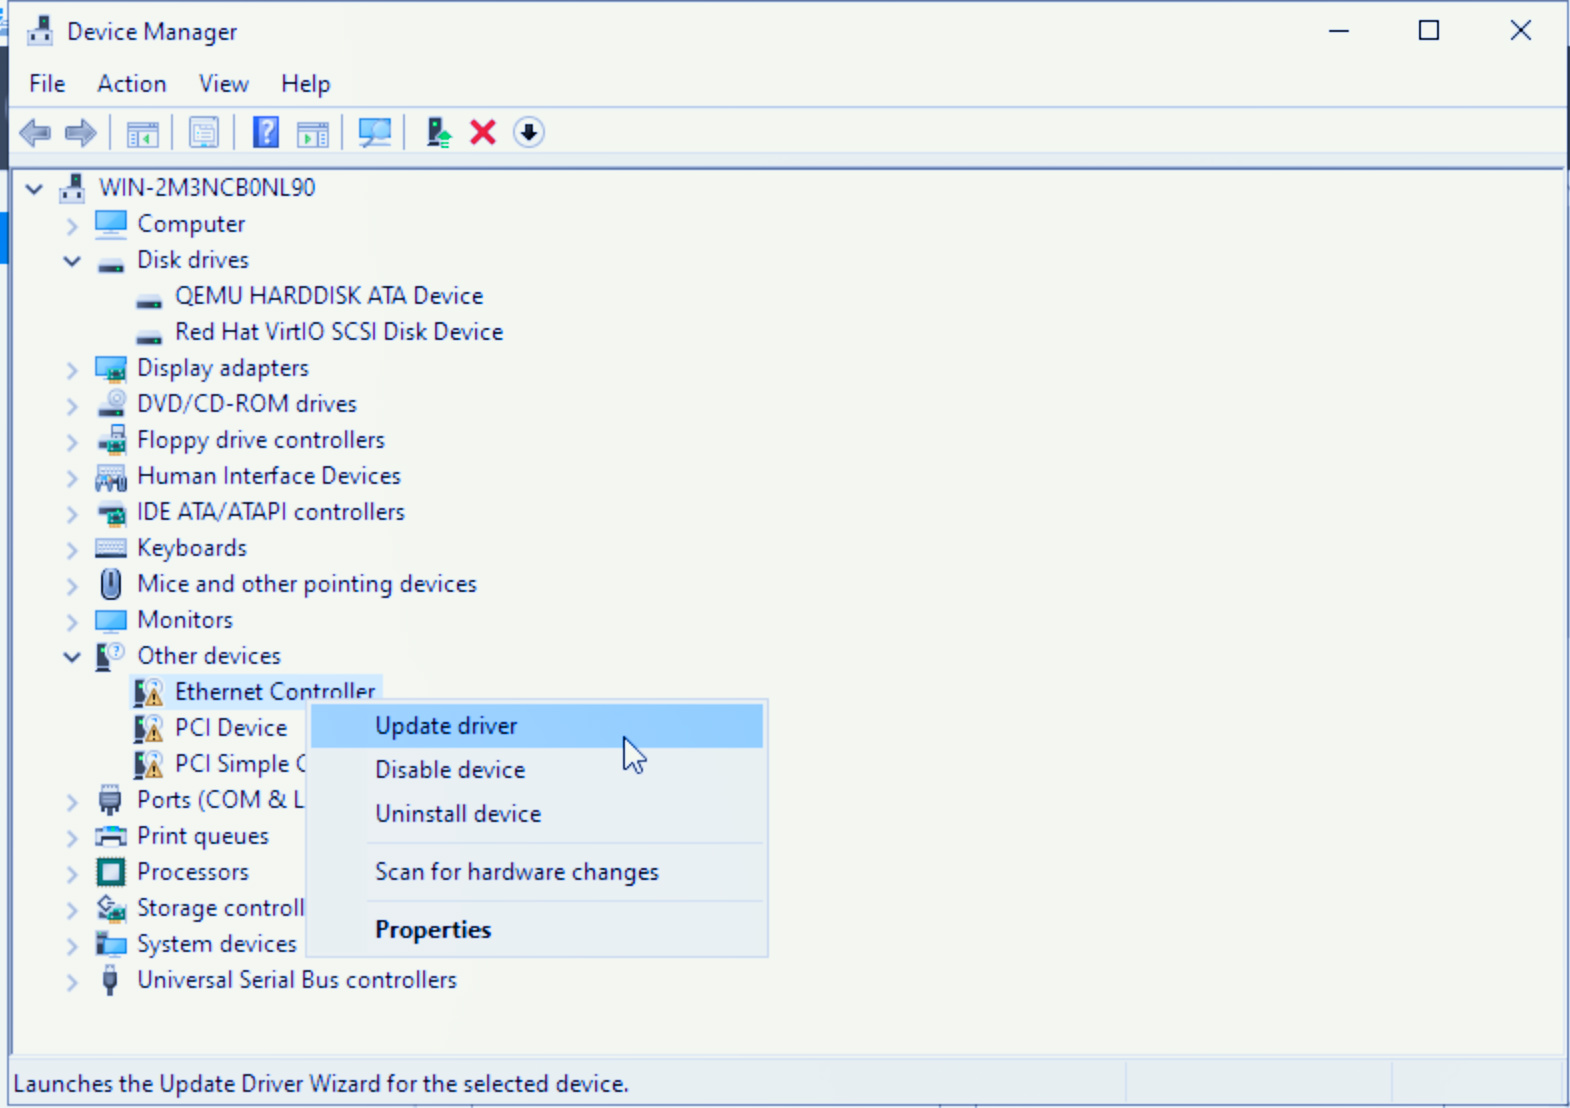
In the Device Manager window, expand Other devices, right-click Ethernet Controller, and select Update driver.
In the pop-up Update Drivers - Ethernet Controller window, click Browse my computer for drivers and select the CD drive for the VirtIO driver. Then, click Next in the Update Drivers - Ethernet Controller window.
In the pop-up Windows Security dialog box, make sure that the driver to be installed is Red Hat VirtIO Ethernet Adapter, then click Install.
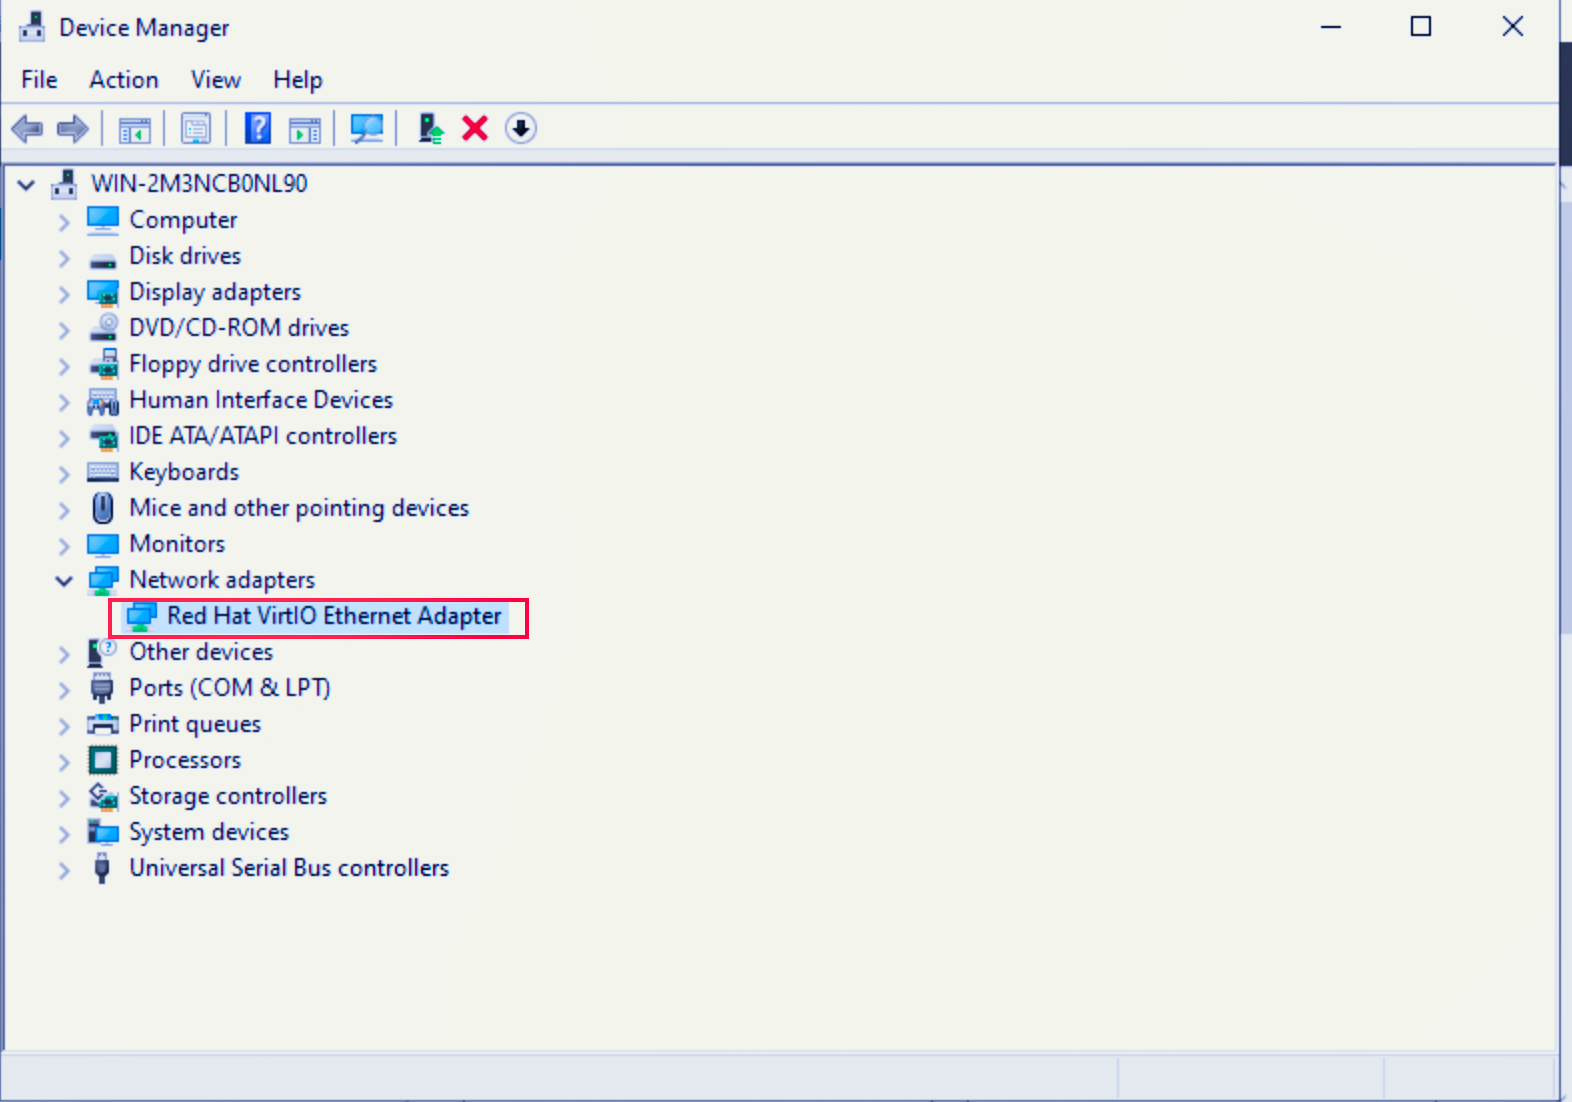
After the installation is complete, if you can find Red Hat VirtIO Ethernet Adapter under Network adapters in the Device Manager window, it indicates that the VirtIO NIC driver has been successfully installed.